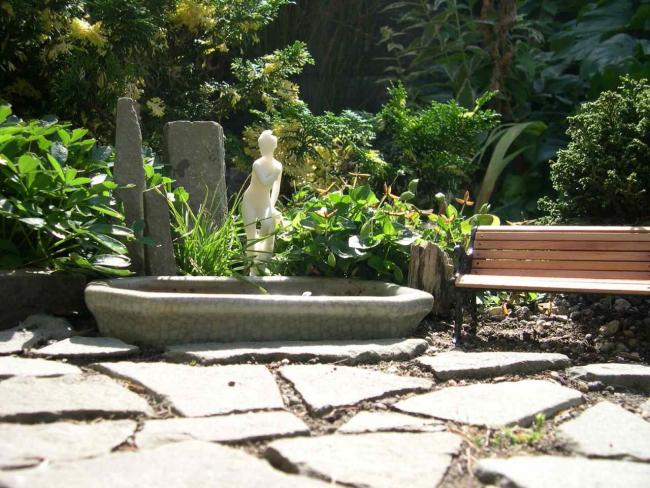
A Garden For All: Tips for photographing your miniature
Try, try and try again. CLICK IMAGE FOR MORE PHOTOS.
Sat, 08/29/2009
I knelt down on one knee, while simultaneously crunching a miniature birdbath, trying to get a shot of my wee, in-ground garden.
I lay down beside it and still couldn’t get the angle that I wanted. Besides, my faded perennials were in the background. Yuck.
I squatted down on the miniature pathway, twisted ever so slightly and dislodged a bunch of the stonework. Dang!
I knelt down again, this time I was sure I got myself in the right spot. Uh. No. And, um, I couldn’t get out of the position either – I need to do more yoga.
There has to be a better way.
I love problems. I’m one of those people that never say die. At a young age, I don’t know exactly when, or how, I discovered there are ways around everything - everything - you just have to find it.
So, when I came across the problem of documenting my in-ground miniature garden, I kept trying different ways to photograph it and I really had to figure out something.
We are in the midst of house hunting and my beloved garden that is finally all together, and looking just lovely – has to be moved soon. Which is why I want to document the heck out of it.
But, at that moment, when I got stuck on one knee without a hand to help me up, I knew that the “thing” (me) holding the camera had to change. So, I got my monopod out. I thought, what have I got to loose accept a wealth of Kodak moments?
(A monopod is like a tripod except with one leg. It’s great for steadying the camera quickly and easily – especially if you zoom a lot or need to focus on the small stuff. Also makes a great walking stick and a weapon if you’re out and about photographing on trails and such.)
I screwed the camera into the monopod, put the camera on the timer, and held the camera upside down at the top of a miniature path, right in the garden.
Click.
Eureka!
No getting stuck, no squished accessories and no upset stones. Yay!
I found a couple more tips to keep in mind with this upside-down/monopod trick:
- Use your museum (or equivalent) setting on your camera. It tends to keep everything in focus – not just what’s in the center of the shot.
- Normally, overcast days would be best to shoot anything, as you don’t get the glaring sun and dark shadows, but I found the direct sunlight added more magic when at the worm’s eye view. The photos that I took during the overcast skies turned out dull and lifeless. Experiment with this.
- My camera is old so I didn’t feel bad about placing it upside down and on top of the ground/stones/plants to keep it steady. If you have a brand new, or expensive camera, use a small pad, or piece of cardboard so you don’t scratch up your nice toys.
- Keep the monopod at 90 degrees to the ground – or a touch higher. If you point it downward, you’ll get too much ground in the shot. If you point it higher, you’ll get the stuff in the life-sized background and the shot won’t look right.
- Be the lens. Note the camera angle and where the lens is pointing and imagine where it’s pointing. You’ll get a feel for it quick enough.
- Take a couple/few shots then load them in your computer to see them. Note what you have to change and go back and test again. Do this until you feel comfortable and then you can go to town with your photographing.
- Pick a focal point. Shoot on the side of the path. Be symmetrical or not at all. Be deliberate.
- Feel free to post your photos on the Two Green Thumbs Miniature Garden Center facebook page! Here’s the link: http://tinyurl.com/l338au.
Have fun with this idea and get out there now while the gardens are still looking good.


